All lessons
TASC AssetsVideo + step screenshots
TASC Assets: complete module walkthrough
Create an asset record, connect controls and manage its inspection and assignment lifecycle.
12 minutes5 stepsCore
Watch first
Captioned walkthrough using the real TASC screen
Do the task
Follow these steps in order
0 of 50%
Review the register
Use site, status, type and due-work filters before adding or changing a record.
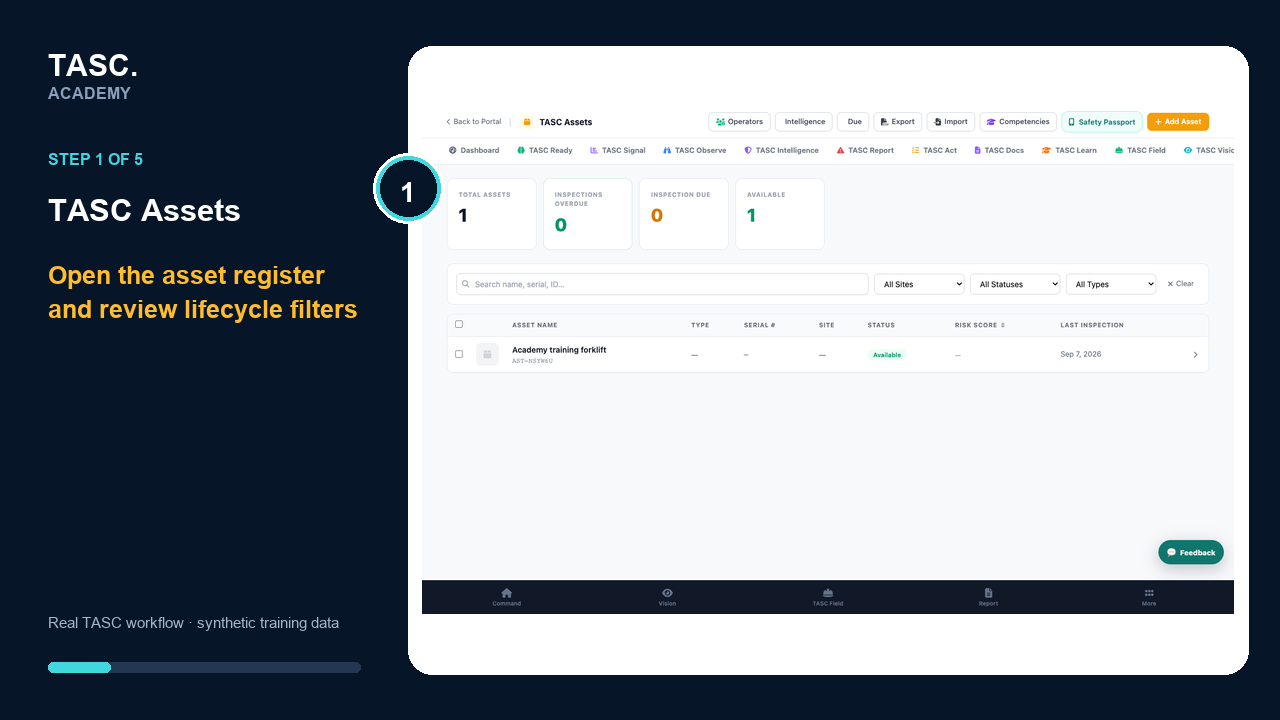 Step 1: Review the register
Add the asset identity
Upload the worker-facing photo and enter the agreed name, type, category, manufacturer, model and serial number.
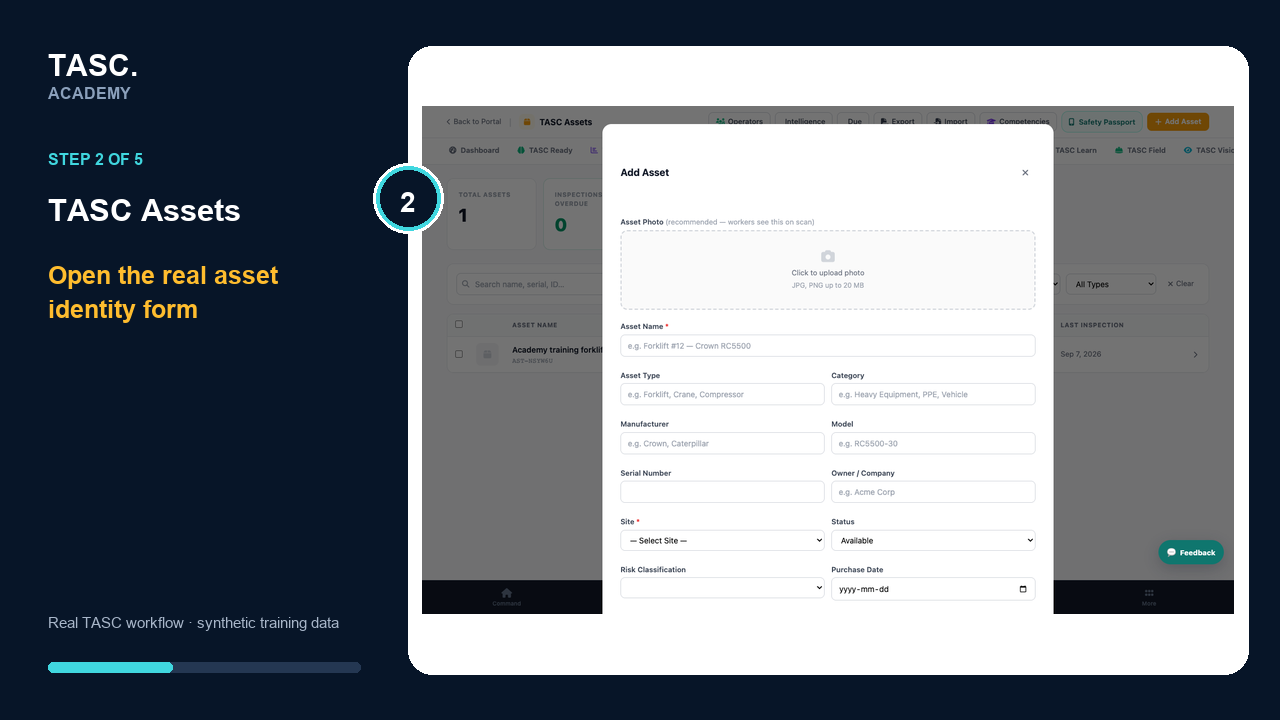 Step 2: Add the asset identity
Set operating context
Choose the site, owner, status, risk and approved worker visibility.
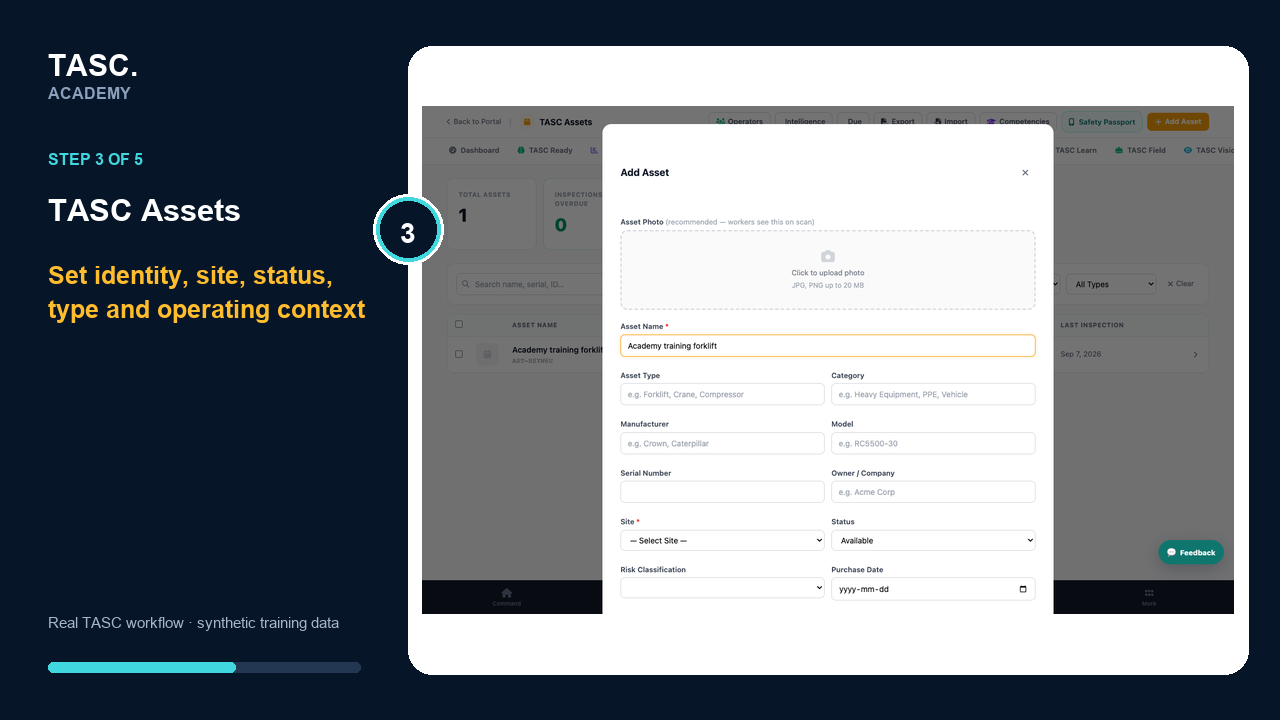 Step 3: Set operating context
Review due inspections and work
Use the due-work view to find upcoming or overdue inspections and assignments.
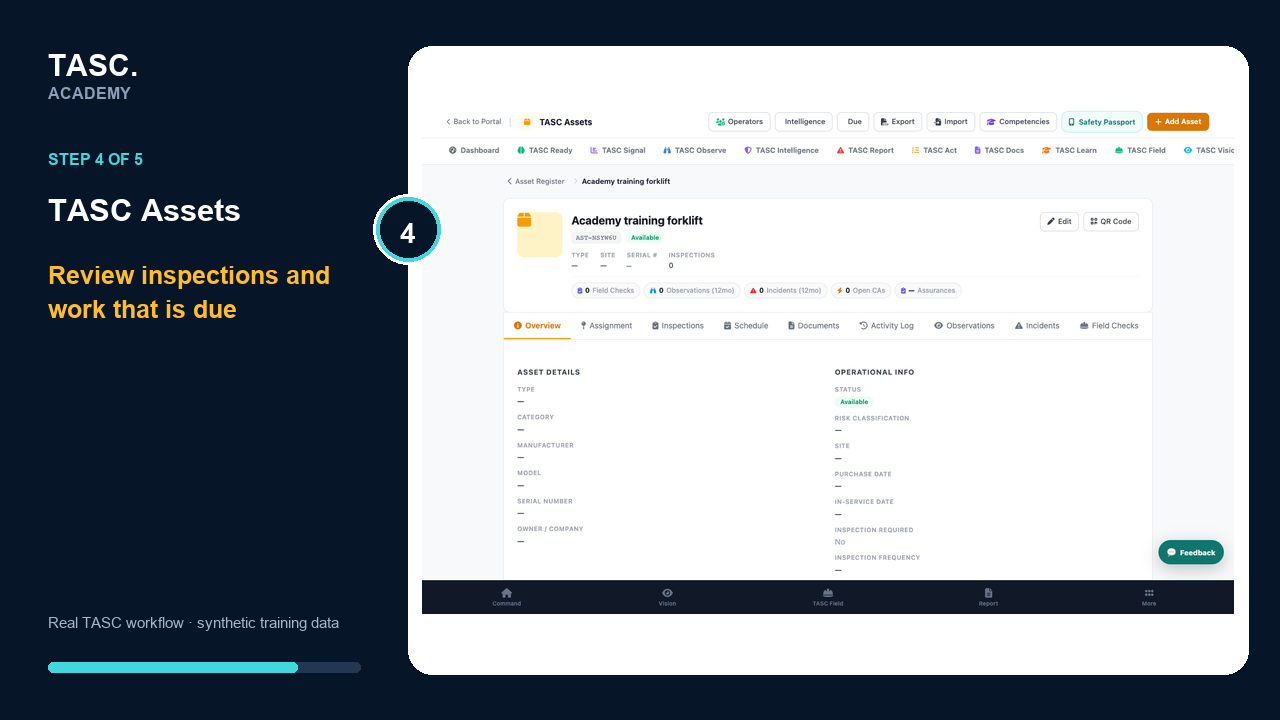 Step 4: Review due inspections and work
Manage the lifecycle
Review assignments, due inspections, defects, out-of-service states and retirement history.
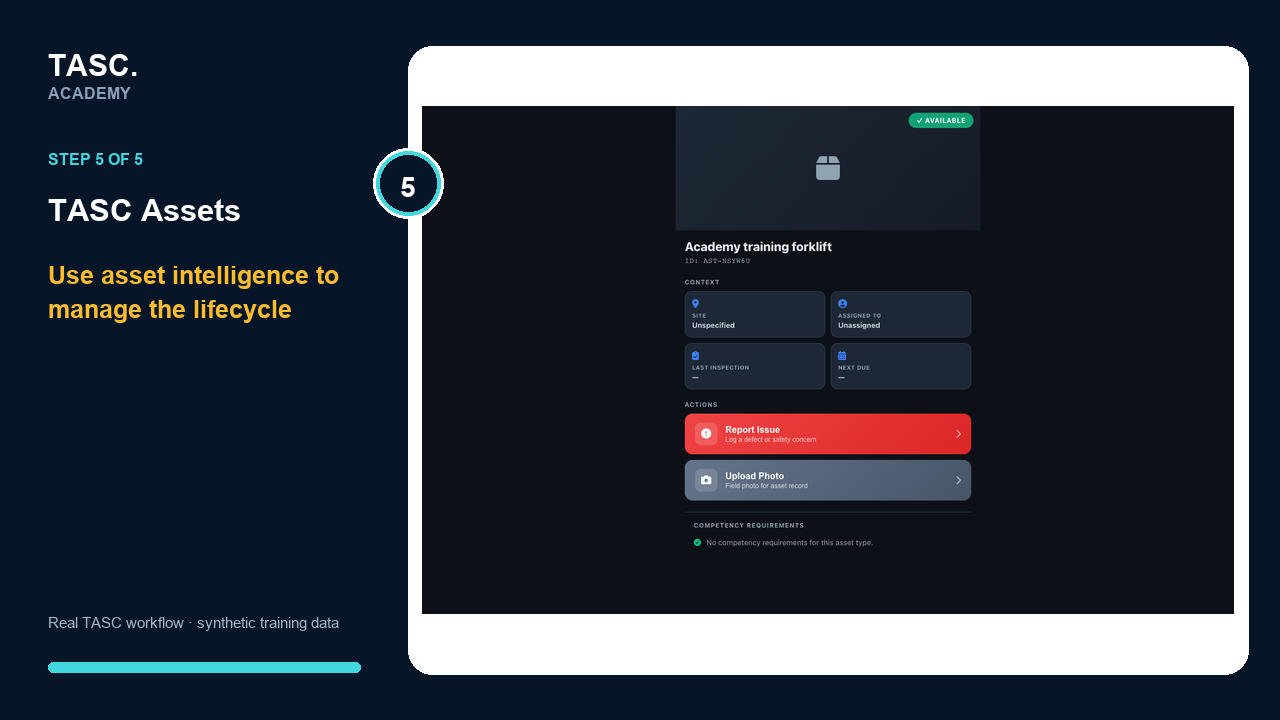 Step 5: Manage the lifecycle
Check that it worked
- The asset is unique and searchable
- Site, owner and status are correct
- Worker visibility exposes only approved information
- Inspection and assignment history are reviewable
If something goes wrong
A duplicate asset is created.
Stop and reconcile the unique identifier before importing or adding more records.
The asset QR shows the wrong information.
Deactivate it, correct visibility and scope, then generate and test a replacement.
Before you begin and supporting details
Before you begin
- Access to the module and the correct site
- A synthetic test case before using live operational information
- A named person responsible for reviewing the result
Find it in TASC
Employer PortalTASC Assets