Build your asset library
Create a maintainable register that connects assets, people, documents, inspections and QR access.
Watch first
Captioned walkthrough using the real TASC screen
Do the task
Follow these steps in order
Set standards and review the register
Agree on names, unique identifiers, types, categories and site ownership, then search the current register before adding records in volume.
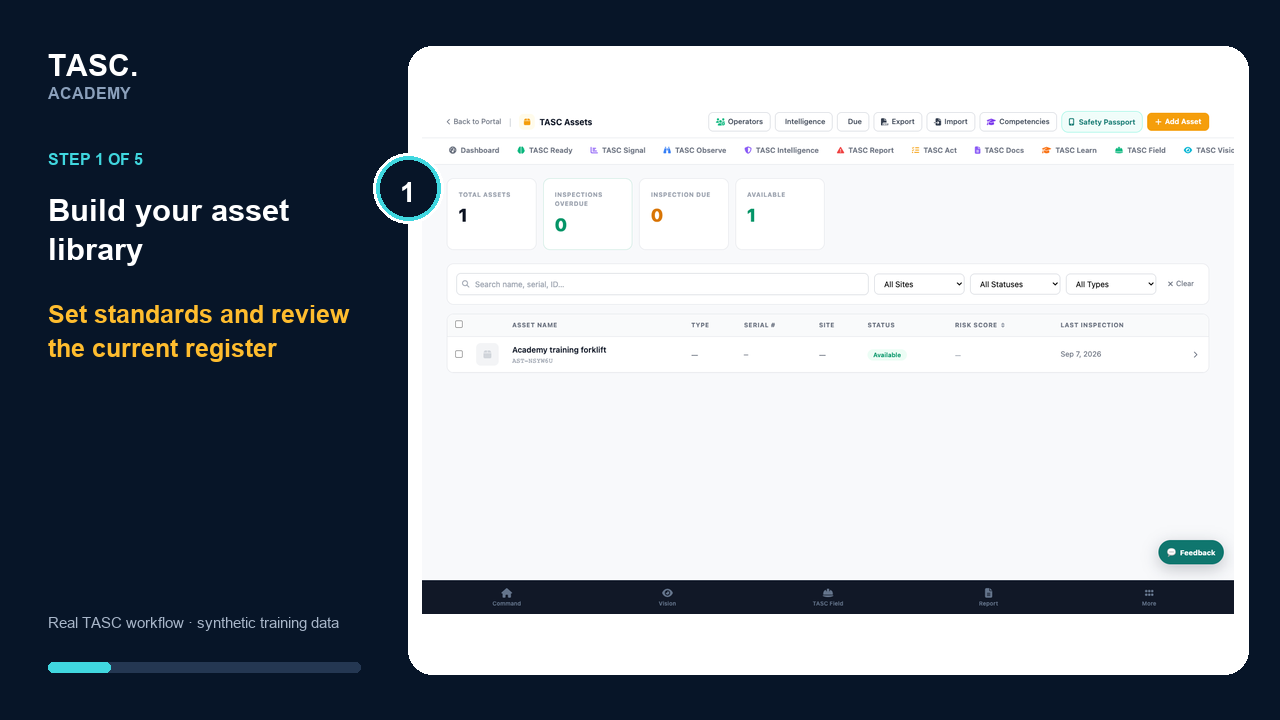 Step 1: Set standards and review the register
Create the asset identity
Open the real Add Asset form and enter the agreed name, type, category, manufacturer, model and unique serial or asset number.
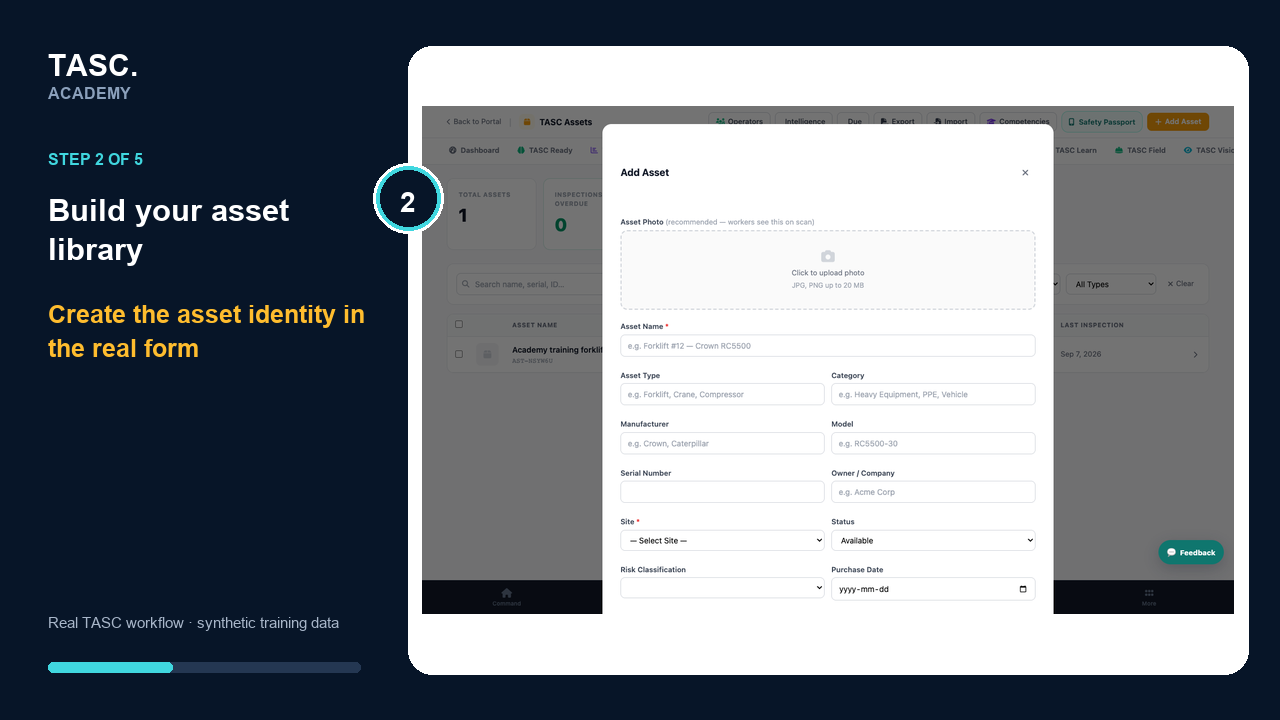 Step 2: Create the asset identity
Set operating context and visibility
Choose the site, owner, status and risk, then confirm what a worker or public QR scan is allowed to display.
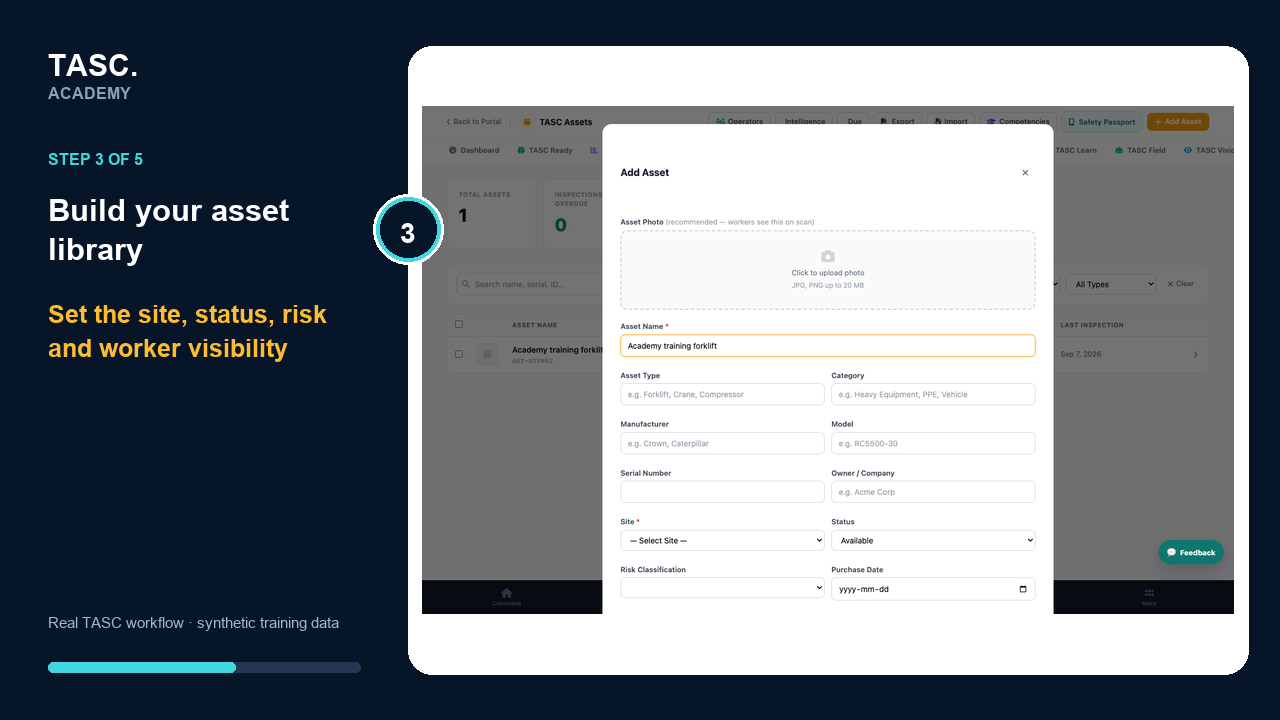 Step 3: Set operating context and visibility
Connect inspections and controlled information
Add appropriate photos, documents, inspection profiles, due dates and competency requirements without exposing restricted material.
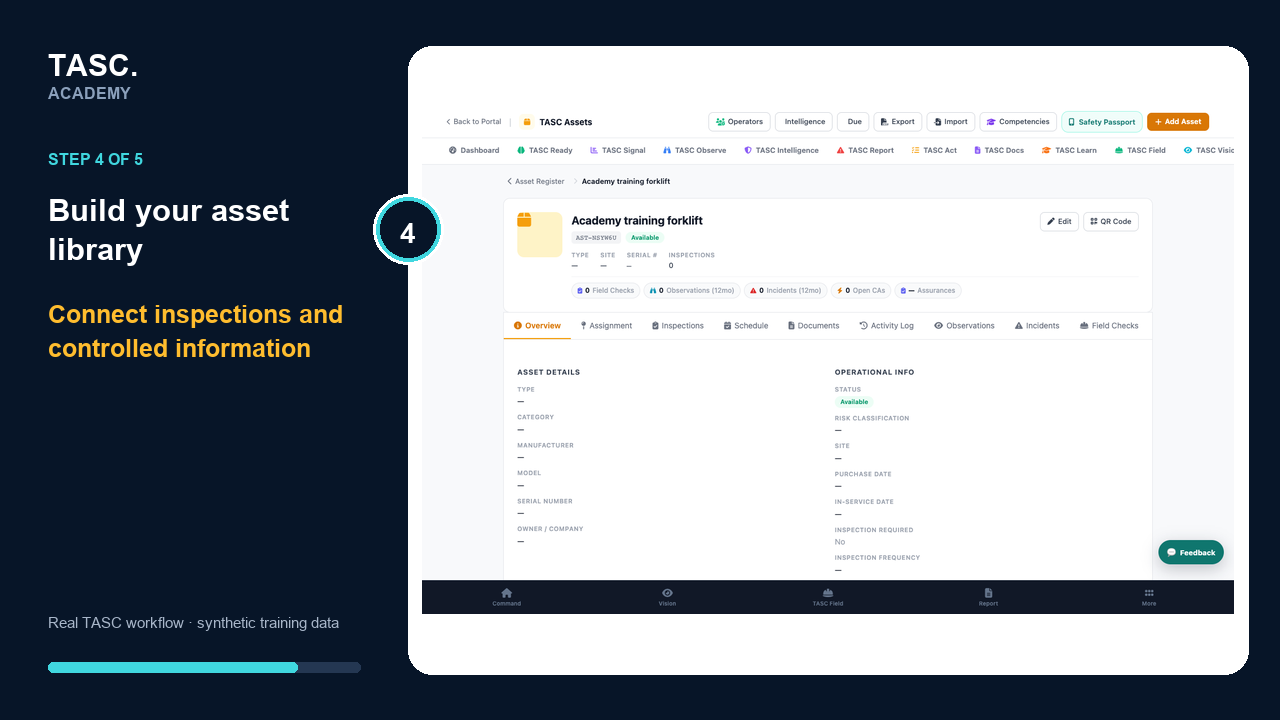 Step 4: Connect inspections and controlled information
Test and manage the lifecycle
Verify the asset QR, worker view, due inspections, assignments, defects, out-of-service state and retirement history.
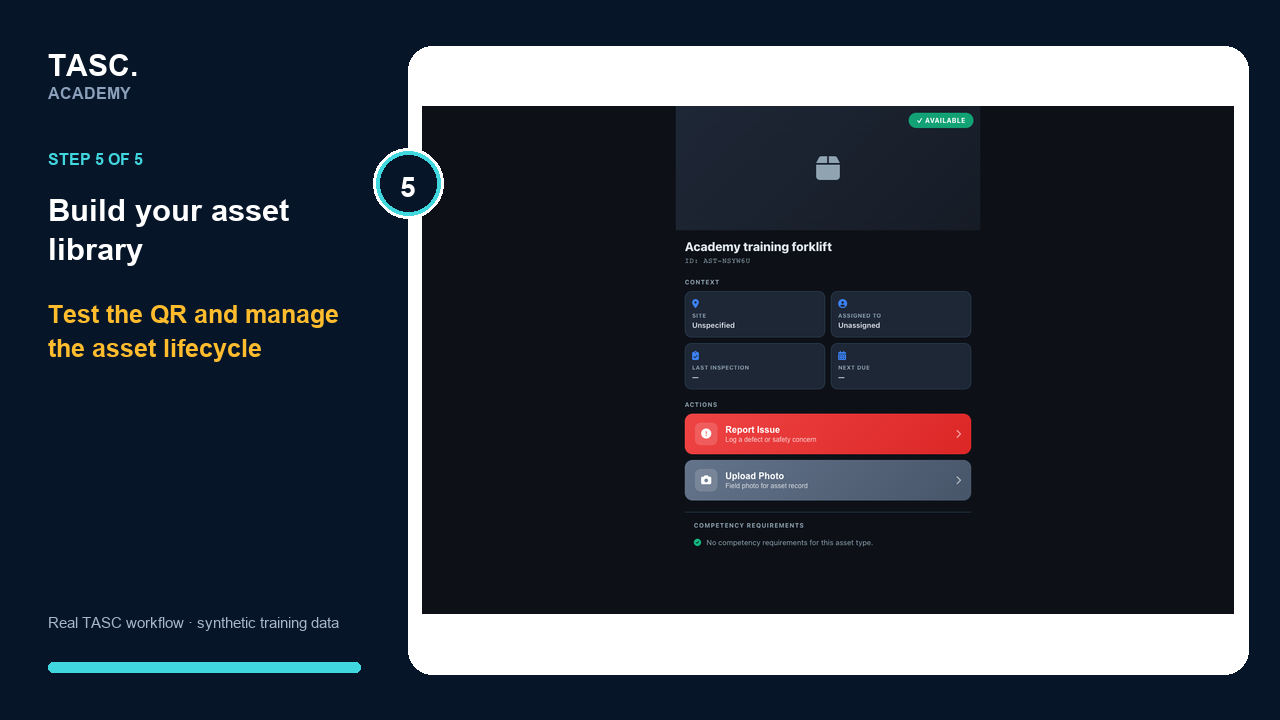 Step 5: Test and manage the lifecycle
Check that it worked
- The asset can be found by name and identifier
- Site, status and risk classification are correct
- Worker scan shows only approved content
- Inspection history and assignment state are reviewable
If something goes wrong
Duplicate assets appear after bulk entry.
Pause imports and reconcile the unique-ID convention before merging or retiring records.
The QR exposes too much information.
Deactivate the code, correct worker visibility and retest with an unconnected participant.
Before you begin and supporting details
Before you begin
- Naming and unique-ID convention
- Asset type, category, site and operating status
- Approved worker-visible information
- Inspection and competency requirements